Brother ScanNCut: Letter Merge Tutorial
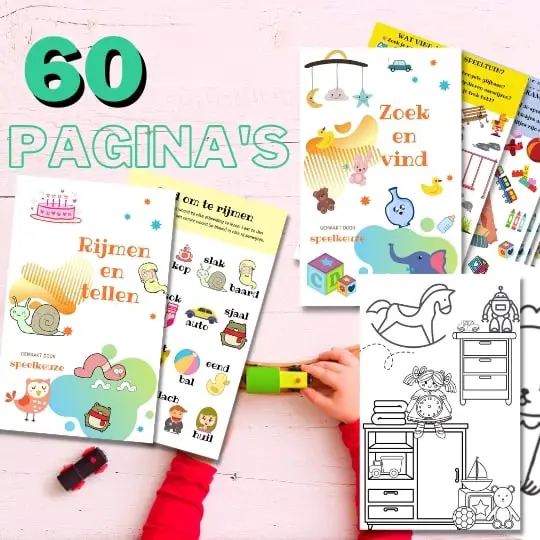
Always something to do for the holidays or rainy day?
Play Choice now has the ultimate activity book collection, with over 60 pages of fun coloring pages and educational puzzles.
Welcome to the Brother ScanNCut tutorial on joining letters.
In this Brother ScanNCut tutorial, you'll learn how to put letters together to make your projects look neater and more professional.
In this article I'll use the Brother ScanNCut machine. If you haven't seen this machine before, you can view it here and see some of her best features.
I'm sure after seeing this amazing tutorial you will slicer you'll wonder how you ever managed without the ScanNCut.
You can scan an image into the machine, whether it's an image you've drawn or an image you already have.
After scanning, you can have the machine cut out this image from paper, cardboard or MDF of your choice.
You can also crop images already saved in the machine.
It also has the added ability to draw on the paper with the included pens, whether it's an image you've scanned in or one of the graphics or lettering already pre-installed on the device.
This machine offers many possibilities and is a major breakthrough in the life of a hobbyist.
In addition to the already installed images, there is also the possibility to put more images on the machine via a USB stick.
These files are called SVG files and there are many available on the internet.
Today we will create a word by selecting the individual letters and then sticking the letters together so that they can be cut out as one piece to use in your project.
This saves time as the entire word is cut out in one go and gives your piece a more professional look.
For this letter pasting tutorial I'm using the Brother ScanNCut CM300, but you can also use the CM350, or another slicer with a digital screen, because the principle is the same.
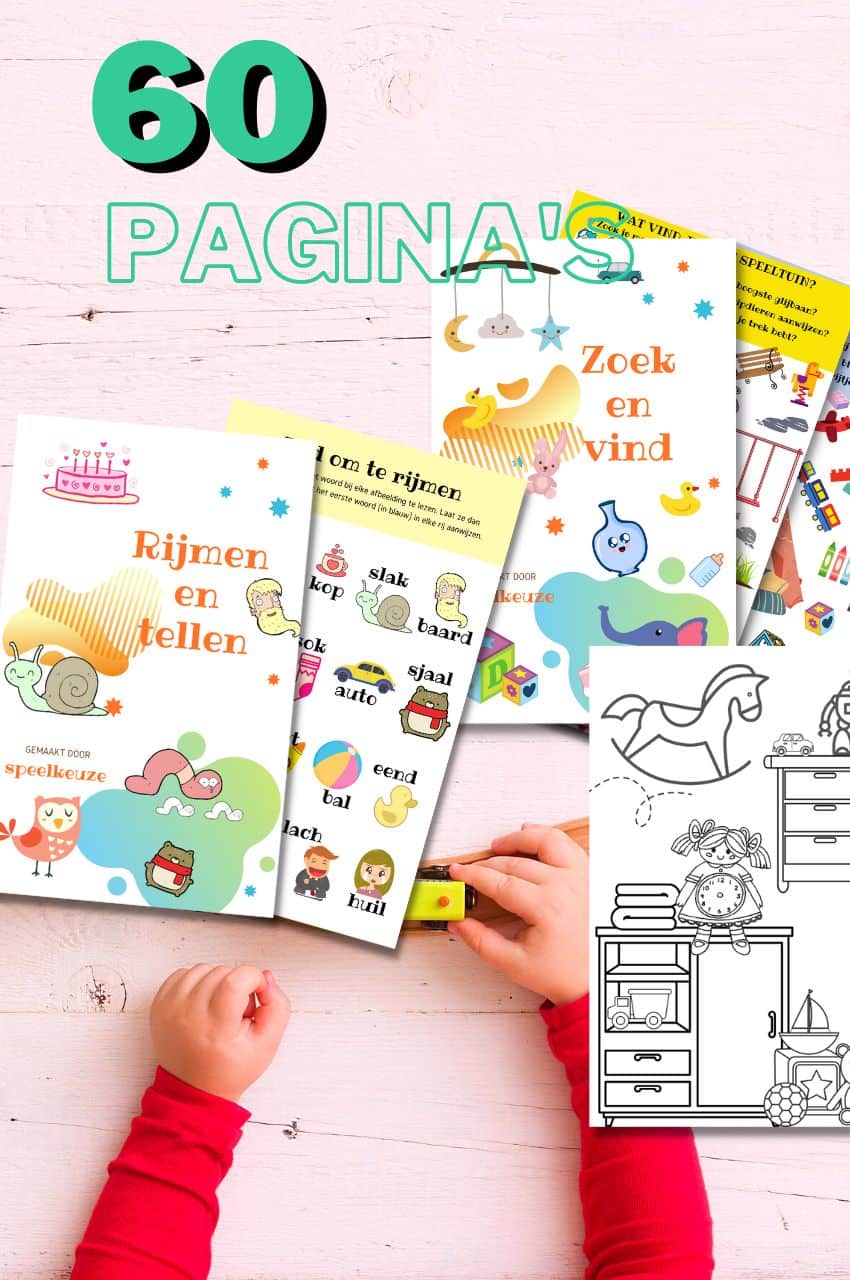
From toddler to toddler activity book collection
Educational games and coloring pages for 3 to 6 years
Your toddler and preschooler will love this e-book, along with the accompanying printables. He or she can play with it at every stage of development, together with mom and dad.
Buy at Bol.comMerging letters tutorial part 1: Choosing your text
This is how you proceed:
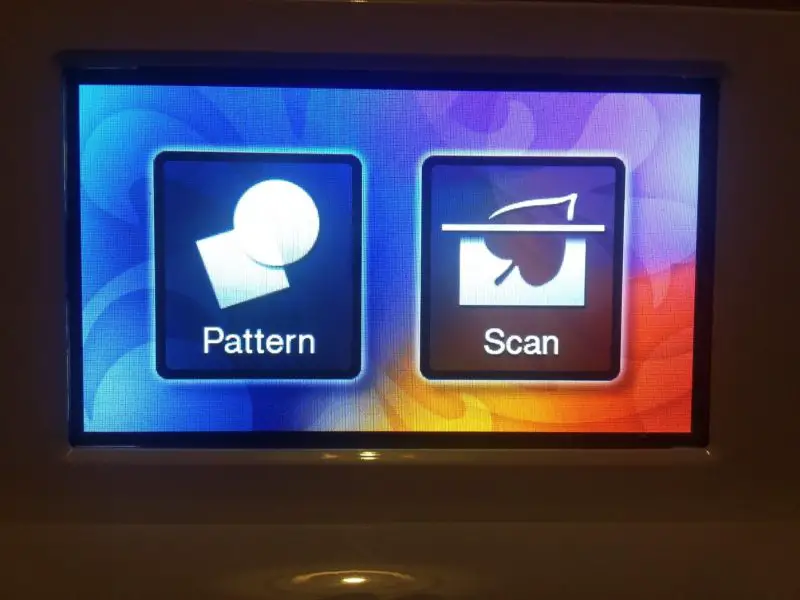
- Turn on the machine and press the HOME button on the left using your finger or the pen that came with your device. Then follow the instructions on the screen to bring the blade to the starting position.

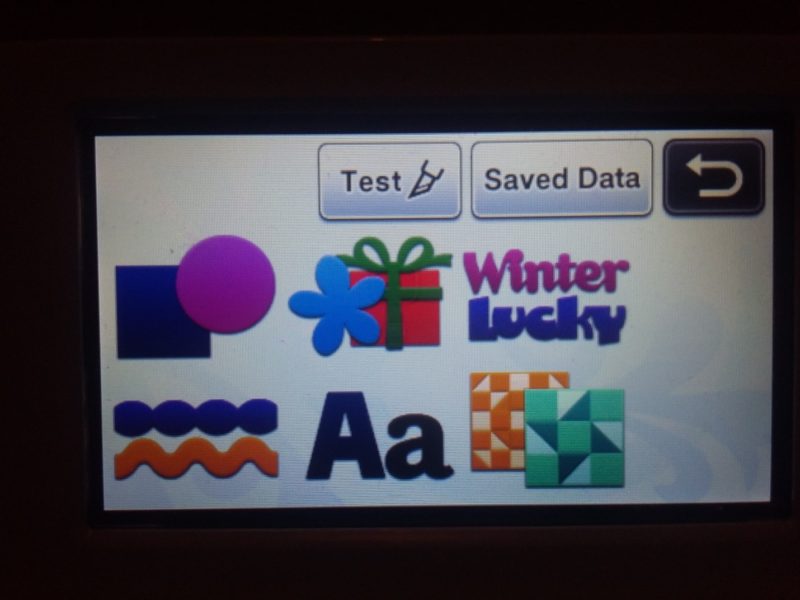
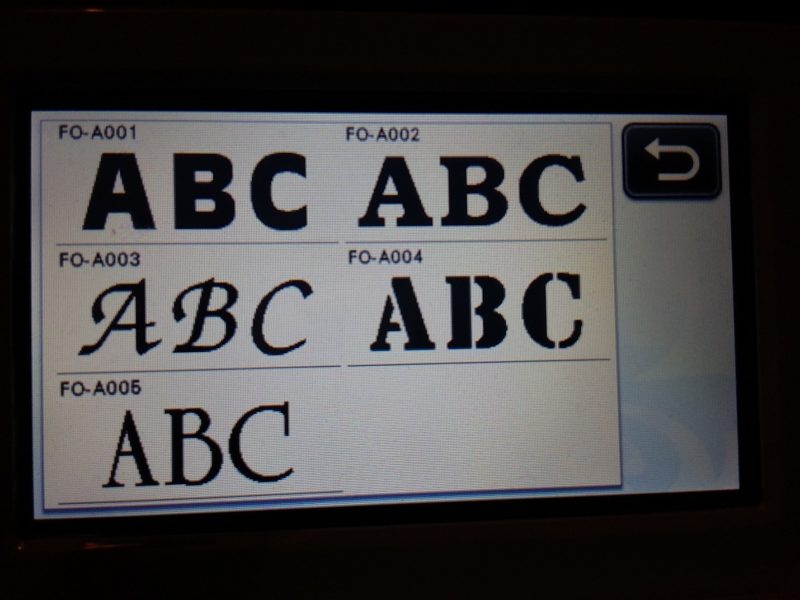
- Press the pattern key and choose the 'Aa' key to switch to a font of your choice. When you've found a font you're happy with, press SELECT. A basic font box is easier to try first, because later you have to overlap the letters and this is easier to do with a font like this.
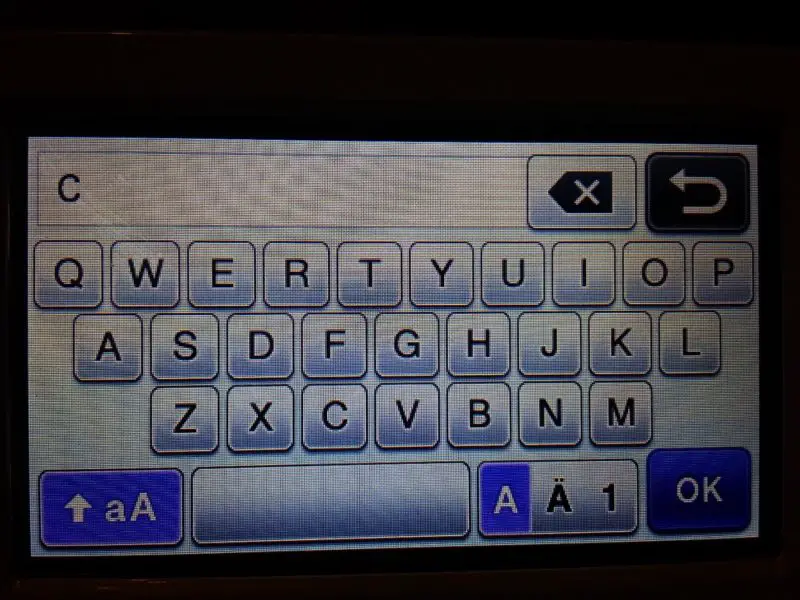
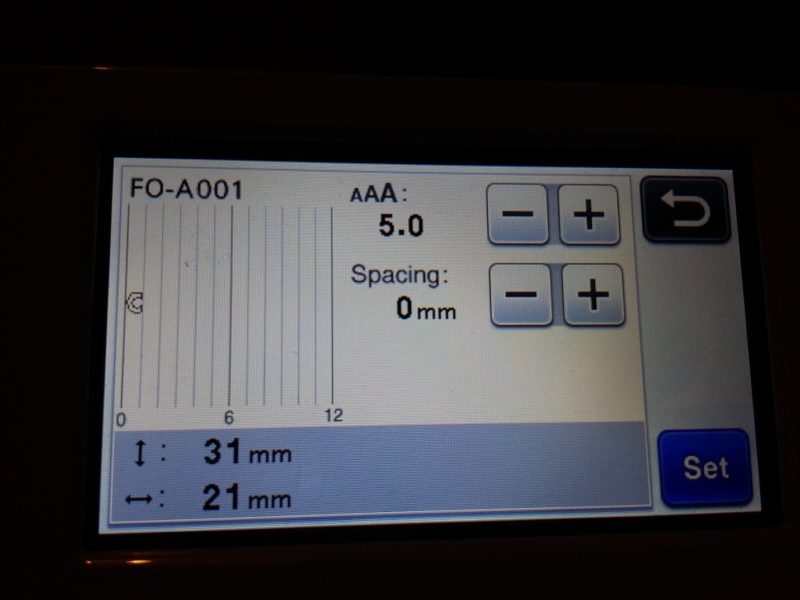
- To be able to stick/weld the letters together, they have to be added to the mat one by one. I will use the word 'CHRISTMAS' as an example. To select your first letter, in this example the letter C, press the letter with your pen and then OK. This is the point where you can adjust the size of your letters, and when you're happy, hit the SET key.
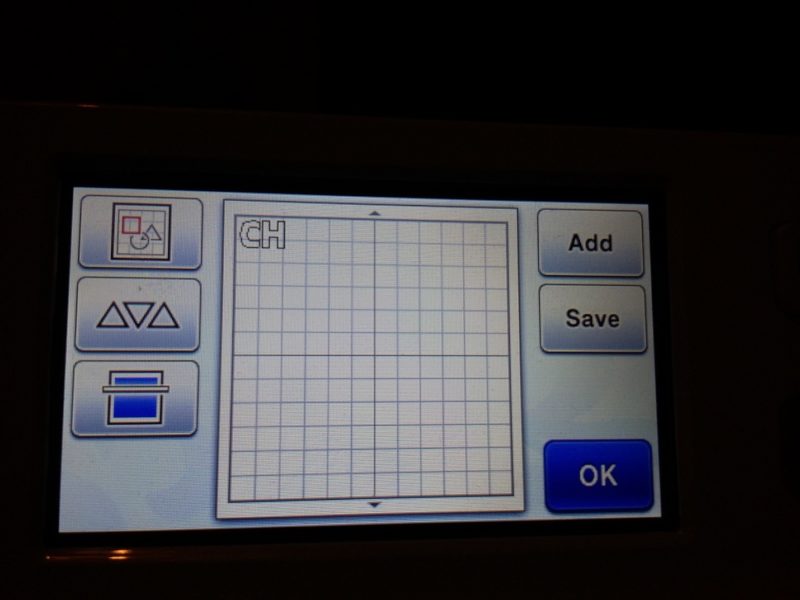
- To add the next letter to the mat, press the ADD button on the right side of the screen, choose the 'Aa' button, select your font and then the next letter in your word. Then press OK and SET to add that letter to the mat. Repeat until all letters have been added to the mat.
Merging letters tutorial part 2: Cutting letters as one image
We are now going to join together the letters you added to the mat in the previous steps.
Proceed as follows:
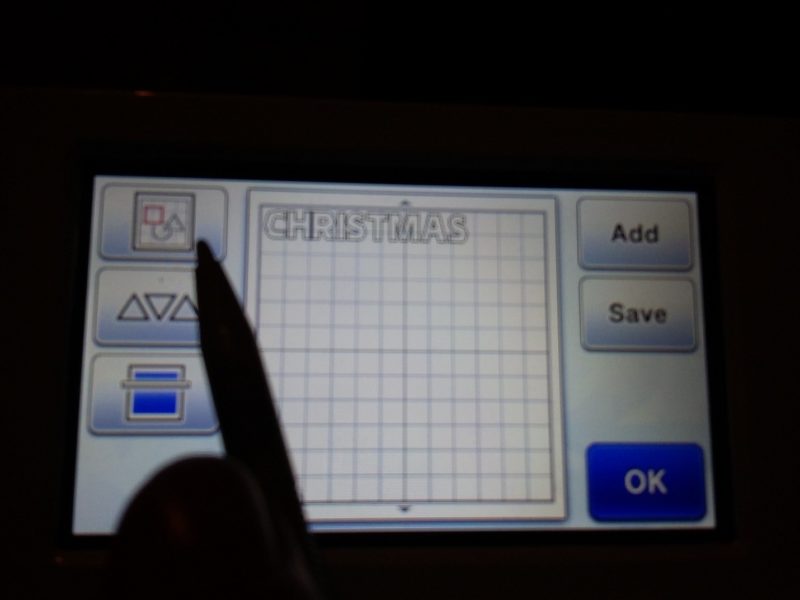
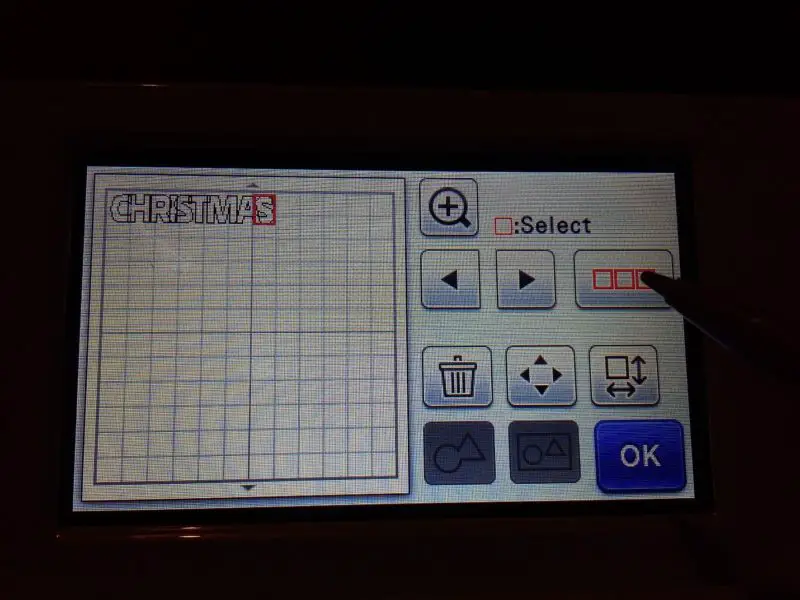
- To join the letters of the word 'CHRISTMAS', the letters have to overlap slightly. Select the ACCESS ALL AREAS button (button at the top left of the photo) and a red square will appear around the last letter of the word (CHRISTMAS). You can move the red square using the arrows on the right of the screen. Press the left arrow until the red square is around the second letter of the word CHRISTMAS.

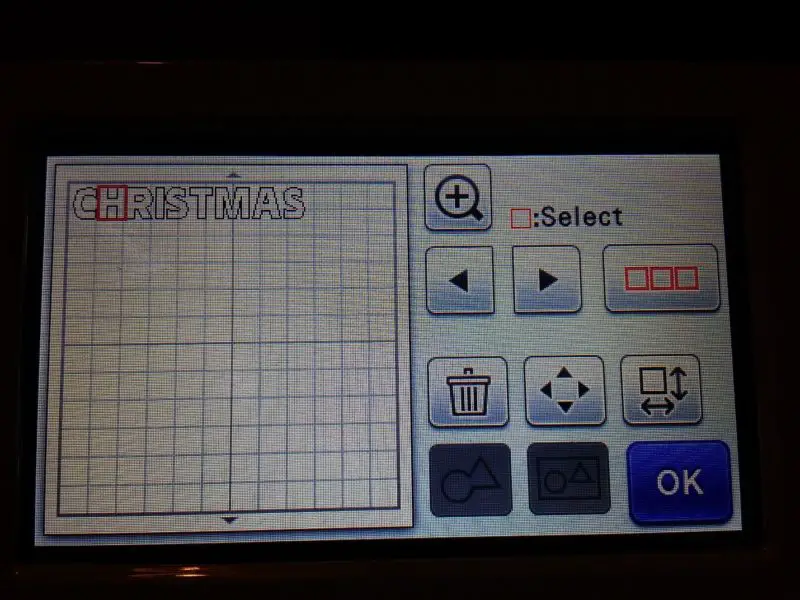
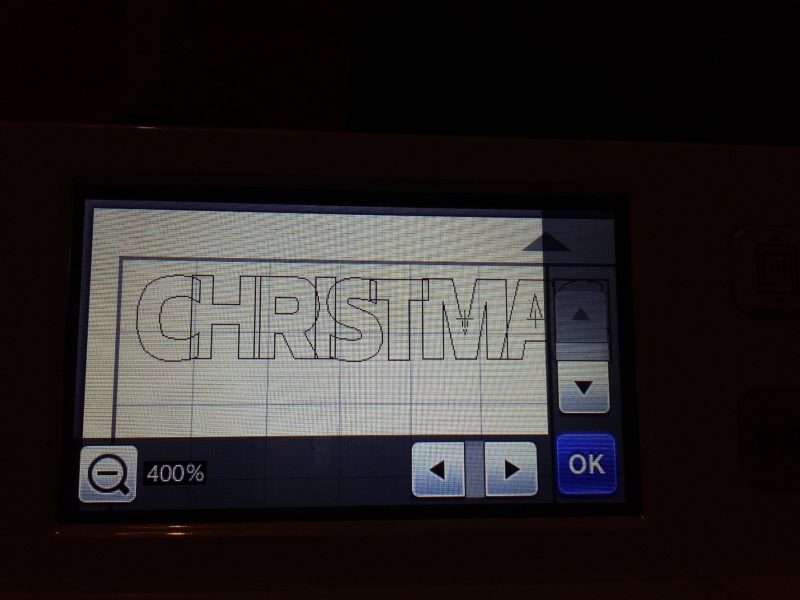
- Press the four arrow button on your slicer and then press the left arrow until the second letter slightly overlaps the first letter. You can check this by using the magnify button on your screen (indicated by the magnify plus sign), press this button again for more detail. I liked working at 400% the best. Repeat these steps until all CHRISTMAS letters overlap slightly and then press OK.
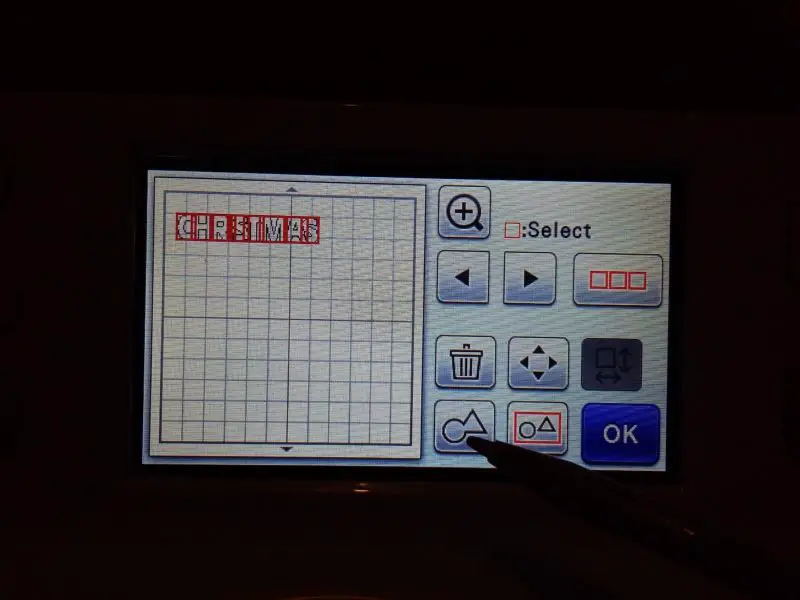
- Select the button with the three red boxes, then tap the image of the mat to group the word, then press OK, followed by the 'weld' button (the button with the circle and triangle merged as shown on the image.) Then press the OK button.
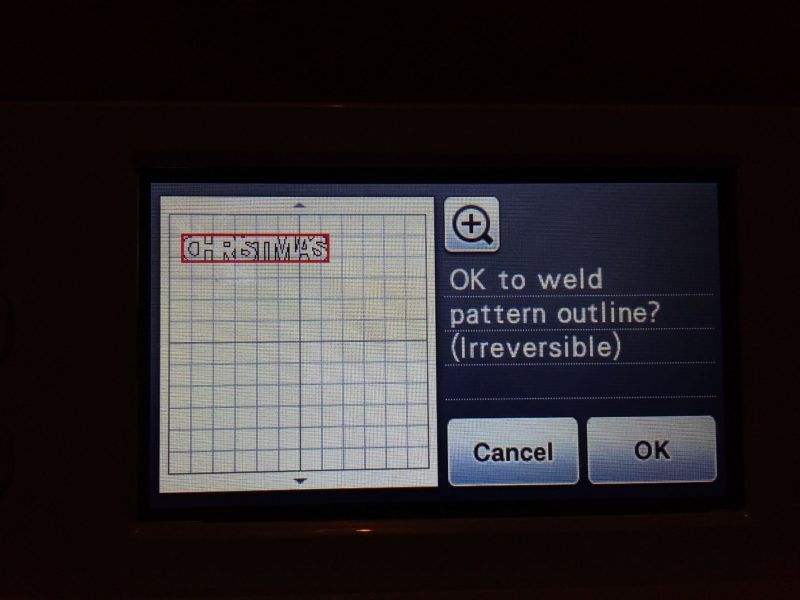
- Now is the time to use the magnifying glass button to check if the letters overlap properly as the welding will be irreversible. If you're not happy, go back and go through the steps above again. When you are satisfied with the result, choose “OK to weld”.
- All letters are now welded together as one image. From this screen, press the OK button and then the CUT button.
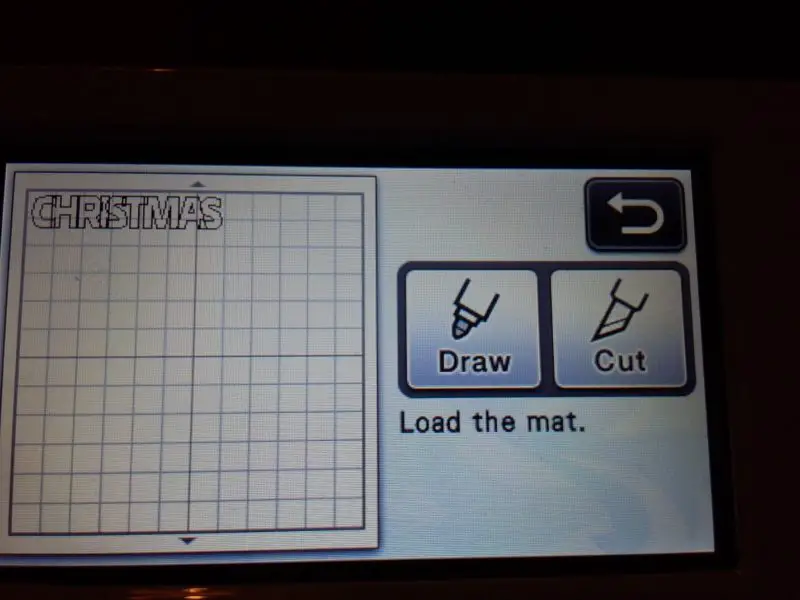
- The specific craft cutting machine will instruct you to load the mat. Place the mat in the machine and press the mat button at the top right to load.
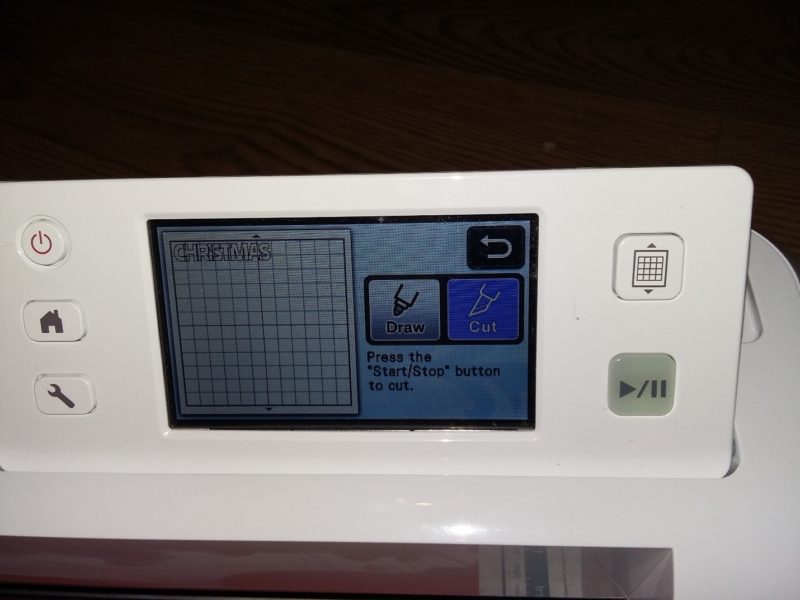
- The machine will then instruct you to press the start/stop button to cut - identified by the green lit button at the bottom right.
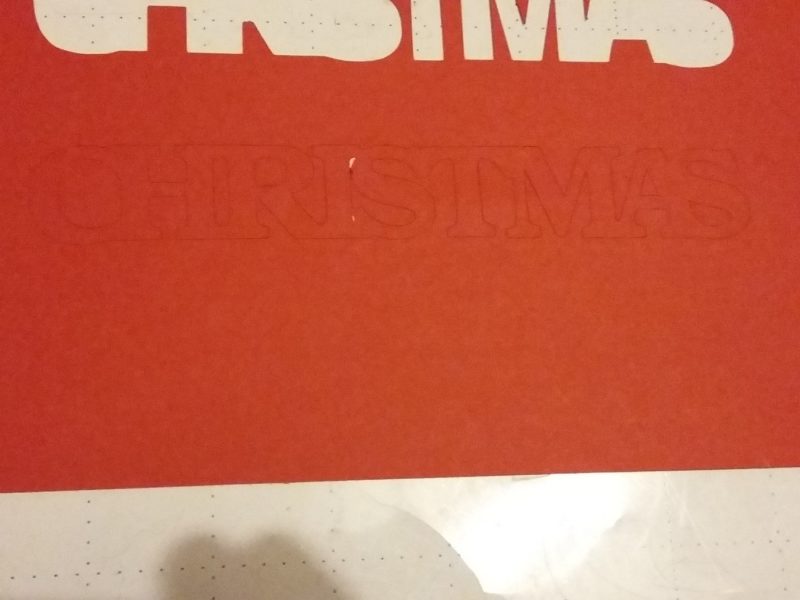
- Once the image is cut out, take out the mat and check that the image is completely cut out. If not, experiment with the depth of cut according to the instructions that came with your machine until the word is completely cut.
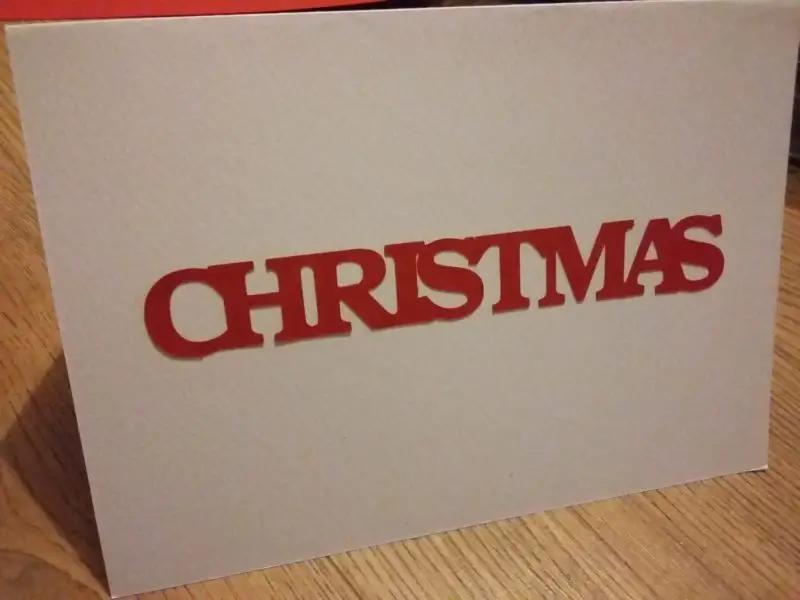
Once you master this simple technique, it opens up a world of possibilities to give your projects a personal and professional look.
Check out what I got done in a few minutes below:
Let us know how it went for you with this letter pasting tutorial and send us your finished projects!
Also read: Children's clothes for Christmas – what do you wear them? Check out our cute tips
Always something to do for the holidays or rainy day?
Play Choice now has the ultimate activity book collection, with over 60 pages of fun coloring pages and educational puzzles.

Joost Nusselder, the founder of Speelkeuze.nl is a content marketer, father and loves trying out new toys. As a child he came into contact with everything related to games when his mother started the Tinnen Soldaat in Ede. Now he and his team create helpful blog articles to help loyal readers with fun play ideas.